Marking Out
When installing electrical equipment and fittings into a building the electrician must decide where and how to fix to the floor, wall or ceiling.
The electrician may have working drawings available, indicating where the various fittings such as lights, switches, power points and / or appliances are to be installed. Symbols are used in the drawing legend to indicate the type of fixture and their exact location in the building.
Dimensions as to the height of switch drops and height of fixtures above the finished floor level are usually included.
With or without the information contained in working drawings the electrician has to translate installation plans into action. The first action is to mark out the exact location for the fixtures to be installed and also the route, which the cables will follow.
Marking a Vertical Line ( Plumb Line )
Plumb lines, sometimes called “plumb bobs” are used to establish VERTICAL LINES.
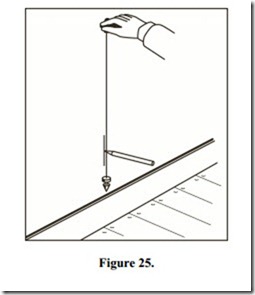
The plumb bob consists of a balanced weight attached through its centre to one end of a piece of twine. It may be held or suspended from a point above. When stable, it will indicate a true vertical line.
See Figure 25.
Two pencil marks to correspond with the line of the twine are drawn, one at each end. Joining these two marks will provide a true vertical line.
Chalk Lines
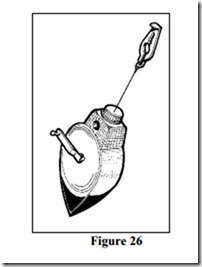
Chalk lines are normally 3-5 metre lengths of twine impregnated with fine chalk powder. With purpose made chalk lines, chalk is applied to the twine as it is played out from the spool. A chalk line is so shaped that it can be used as a plumb bob.
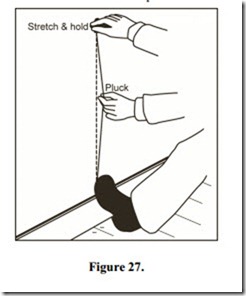
To mark a chalk line, use the free hand to lift the tautly held string away from the wall and then release it. The string will spring back and deposit a line of chalk on the surface of the wall. See Figure 27. For long runs, fix the line at both ends and pluck in a similar manner near the centre.
Marking a Horizontal Line ( Spirit Level )
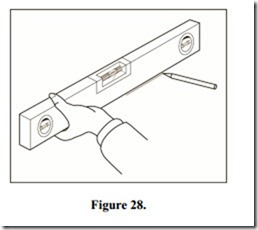
The most common tool used to produce a horizontal line is a spirit level.
It consists of a straight edge, generally made of aluminium. A tough glass tube is fixed into the middle and both ends. These tubes are almost completely filled with liquid. Only a small air bubble remains. When the air bubble is located centrally between two markings on the centre tube, the spirit level is horizontal and a pencil line can be drawn. A spirit level may also be used to mark vertical lines. The tubes at either end are used for this purpose. Some models facilitate the marking of a 45° line using one end. Sizes vary from about 250mm to 2 metres long.
A level should be treated with care. For accurate marking, ensure that the bubble is equally spaced between the two lines on the glass tube.
Measuring Off
Horizontal lines can be drawn by measuring off from a common base. On walls this base could be either the floor, top of the skirting board or a ceiling surface provided these are reasonably level and even. Identical measurements are taken a short distance out from the corner of the wall, floor or ceiling and marked out. For long runs, intermediate points may also have to be marked out.
A chalk line is stretched over these marks for the required distance and ‘plucked’ to mark a line. Alternatively a long straight edge could be utilised.
The measuring off method is used in many situations where installations are made parallel to existing features, such as doorframes, architraves, skirting boards, ceiling cornices, rather than at the ‘true’ vertical or horizontal.
Never mark or draw, more lines than are absolutely necessary particularly on decorated surfaces. If you must mark the walls use chalk lines ( white ), which can be easily erased later.
Marking Out on a Ceiling
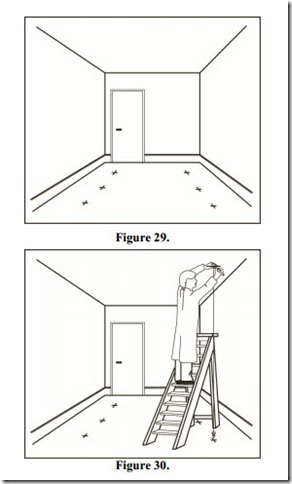
Marking out directly onto a ceiling is difficult without assistance. An alternative method is to mark out on the floor and transfer the points to the ceiling by use of a plumb line.
Figures 29 and 30 illustrate this process.
· Set out the fixing points and the direction of the fixtures on an unobstructed floor. The centres of these fixing points should be marked out with crosses that intersect exactly at right angles.
· Use a plumb line suspended from the ceiling so that the plumb bob is just clear of the floor.
· Move the plumb line until the point of the plumb bob rests exactly over the centre of the mark on the floor, then put a mark on the ceiling at the point of suspension.
