Solenoid Coils
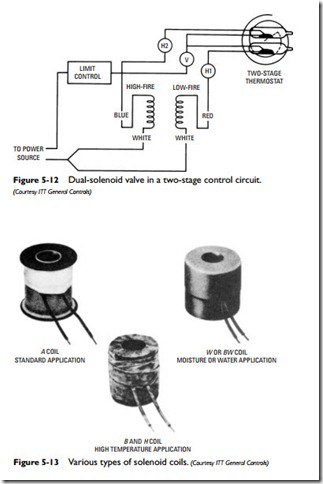
Several different solenoid coils are available from manufacturers, and the type selected for use will depend on the specific application. For example, most standard applications will require a moisture- resistant coil for normal usage of gas or fluid up to 175F° . Special applications include those with especially high ambient and fluid temperatures, high voltage, or high steam pressure. A solenoid coil may also be specifically required for moisture or water applica- tions. Under these circumstances the coil should be both water- proof and fungus proof. Some examples of solenoid coils are shown in Figure 5-13.
A principal cause of coil malfunction is excessive heat. If the valve is subjected to temperatures above the coil rating, it will prob- ably fail. A missing part, a damaged plunger tube or tube sleeve, or improper assembly may also be a cause of excess heat. The applied voltage must be at the coil’s rated frequency and voltage.
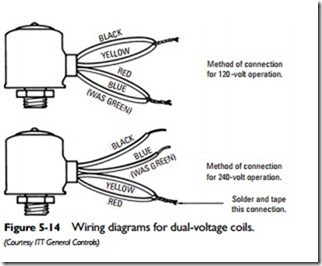
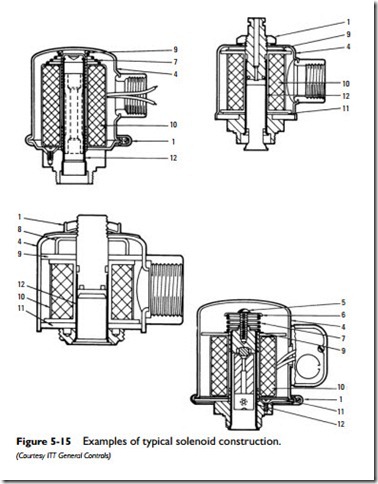
Always turn off the electrical power to the solenoid valve before attempting to replace the coil. Then, having turned off the electrical power, disconnect the coil leads. Figures 5-14 and 5-15 are schematics of some typical solenoid valves. The numbers in the illustrations refer to the valve components in their order of disassembly and are identified as follows:
1. Jacket retaining nut or screw assembly.
2. Elbow for coil leads.
3. Valve O-ring.
4. Coil jacket or coil assembly.
5. Nut or screw.
6. Spring retainer.
7. Plunger tube spring.
8. Screw assembly spacer.
9. Top washer and/or sleeve assembly.
10. Solenoid coil.
11. Bottom washer and/or sleeve assembly.
12. Plunger tube.
The solenoid coil should be reassembled in reverse order, but with the following precautions:
1. Be very careful to reassemble the top washer and/or sleeve assembly (No. 9 above) exactly as it had been assembled. Improper assembly will cause the solenoid coil to burn out.
2. Be sure to align the top washer and/or sleeve assembly so that the coil leads have an unobstructed passage out of the solenoid.
3. Properly align all slots in the bottom washer and/or sleeve assembly.


