Installation Instructions
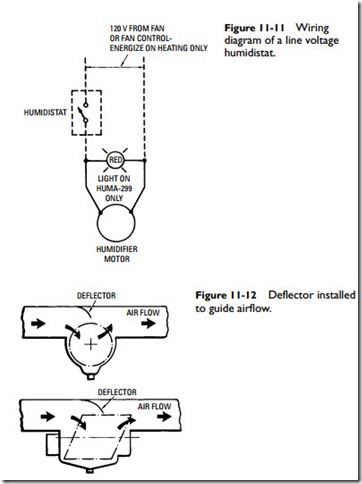
A common location for a bypass humidifier is on the underside of a horizontal warm-air supply duct as close to the furnace as convenient working conditions will permit. The duct should be at least 12 inches wide (see Figure 11-12). As shown in Figure 11-12, a deflector should be installed in the duct to guide the airflow into the humidifier. The deflector should be about 4 to 5 inches wide. It can be cut from sheet metal and screwed to the duct wall with sheet-metal screws.
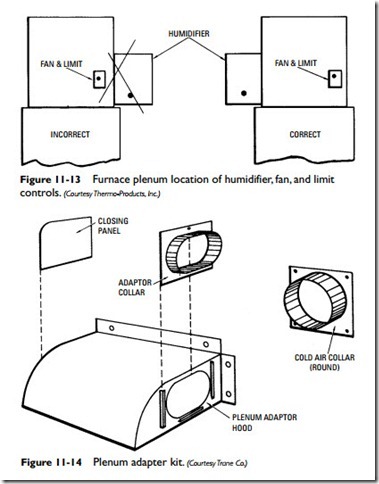
If the humidifier is to be installed in a furnace plenum that also contains a fan and limit control, care must be taken to keep the sensing element of the fan and limit control a suitable distance from the inlet of the humidifier (see Figure 11-13); otherwise, the return air may be drawn through the humidifier and over the element and cause improper operation of the fan control.
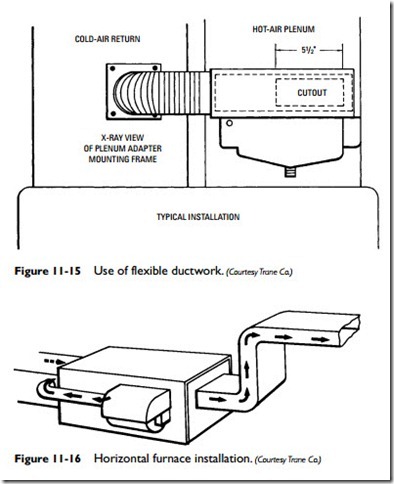
Humidifiers are also installed on the sides of furnace plenums. The manufacturer usually supplies a plenum adapter kit to mount the humidifier. As shown in Figure 11-14, a typical kit consists of a plenum adapter hood, closing panel adapter collar, and round cold- air collar. A length of flexible or galvanized ductwork is installed between the adapter hood and the cold-air collar (see Figure 11-15).
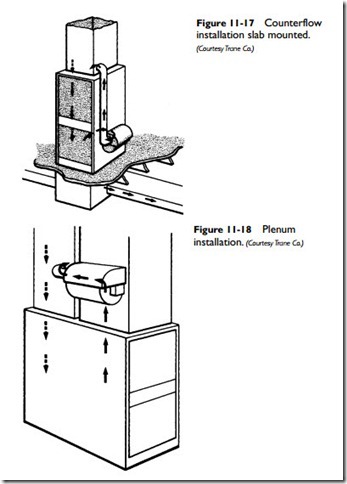
The most desirable location for a humidifier is the warm-air plenum. Some special installations are illustrated in Figures 11-16, 11-17, and 11-18.
If the adapter is installed on the cold-air return plenum, the distance that the hot air is ducted must be as short as possible. In an air-conditioning system, a damper must be installed to close off the
cold-air return opening during the cooling season. If the opening is not closed, sufficient air can circulate through the shutdown humidifier to frost the evaporator coil.
The following recommendations should be followed when installing a bypass humidifier:
1. Carefully read the manufacturer’s installation instructions and any local codes and regulations that would apply to the installation of a humidifier.
2. Unpack the humidifier and examine it for any shipping dam- age. Check the equipment and parts against the inventory list.
3. Place the humidifier base or template against the duct or plenum wall, and mark the position where it will be mounted.
4. Cut out the opening for the humidifier, and mount it accord- ing to the manufacturer’s instructions.
5. Connect the saddle valve to a convenient water line. Never
connect to a water line supplying chemically softened water.
6. Install the required drain fittings and connections in the reservoir.
7. Turn on the water supply, and fill the reservoir. The float valve arm should be adjusted to maintain a 2-inch water level in the reservoir.
8. Place the drum or wheel in the reservoir so that the axles are properly seated on the sloped supports. The gears will mesh automatically. Do not attempt to rotate the drum by hand because you may damage the gears inside the motor.


